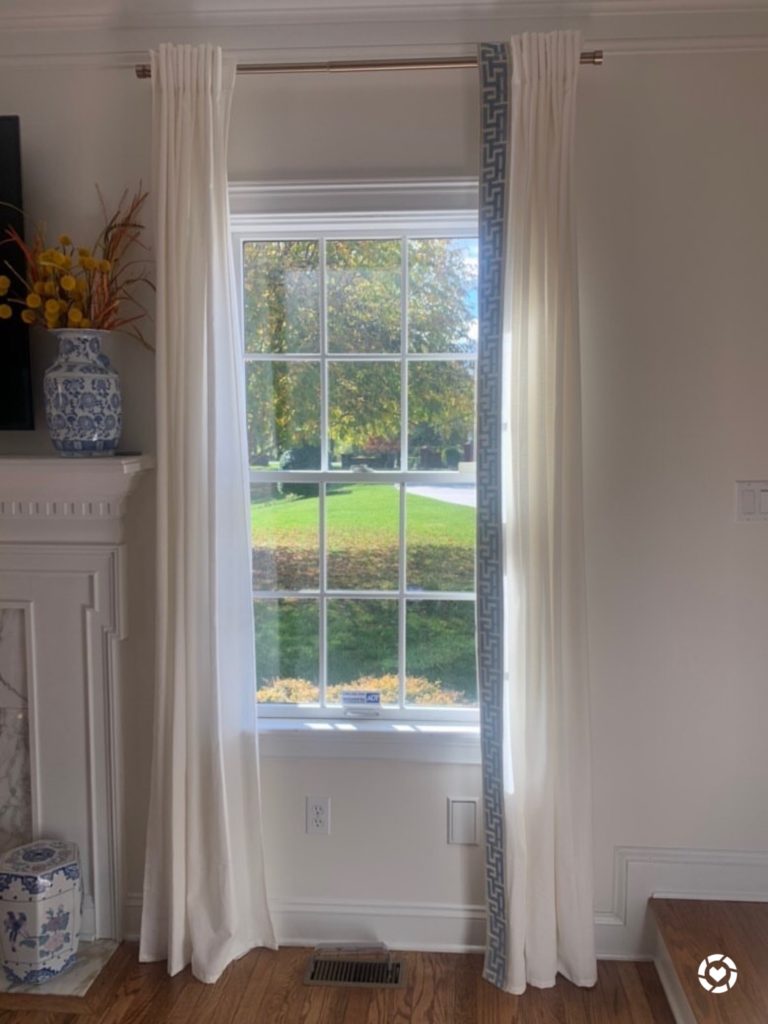
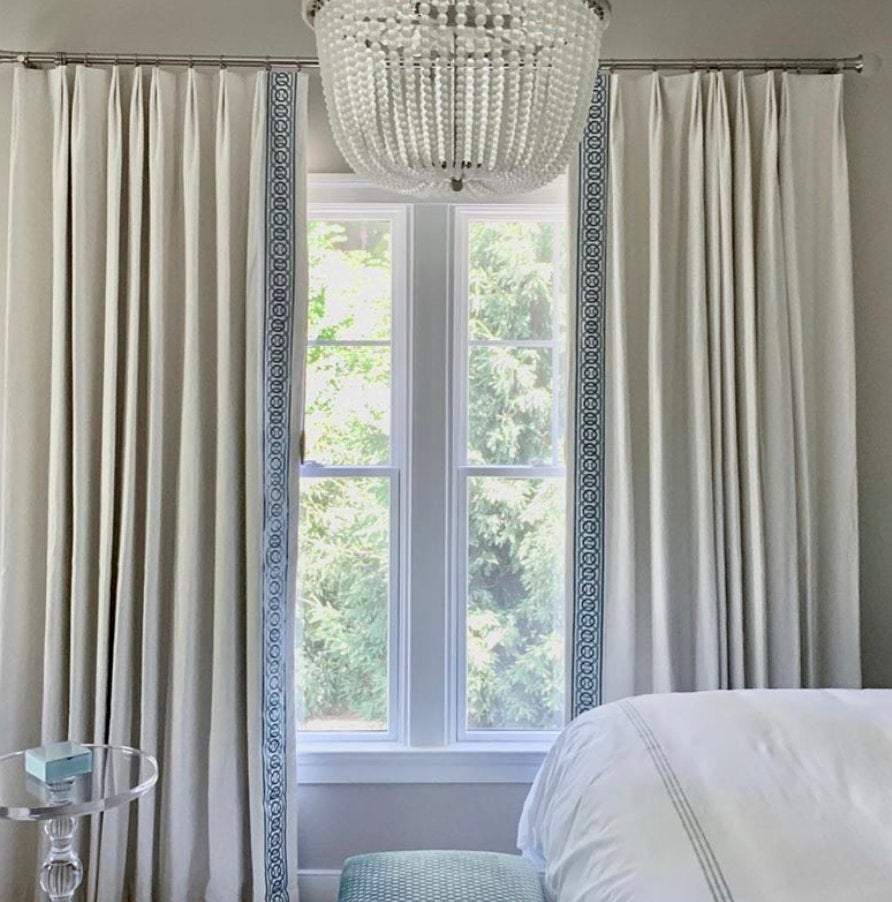
How to achieve a chic tape trim curtain–for less!
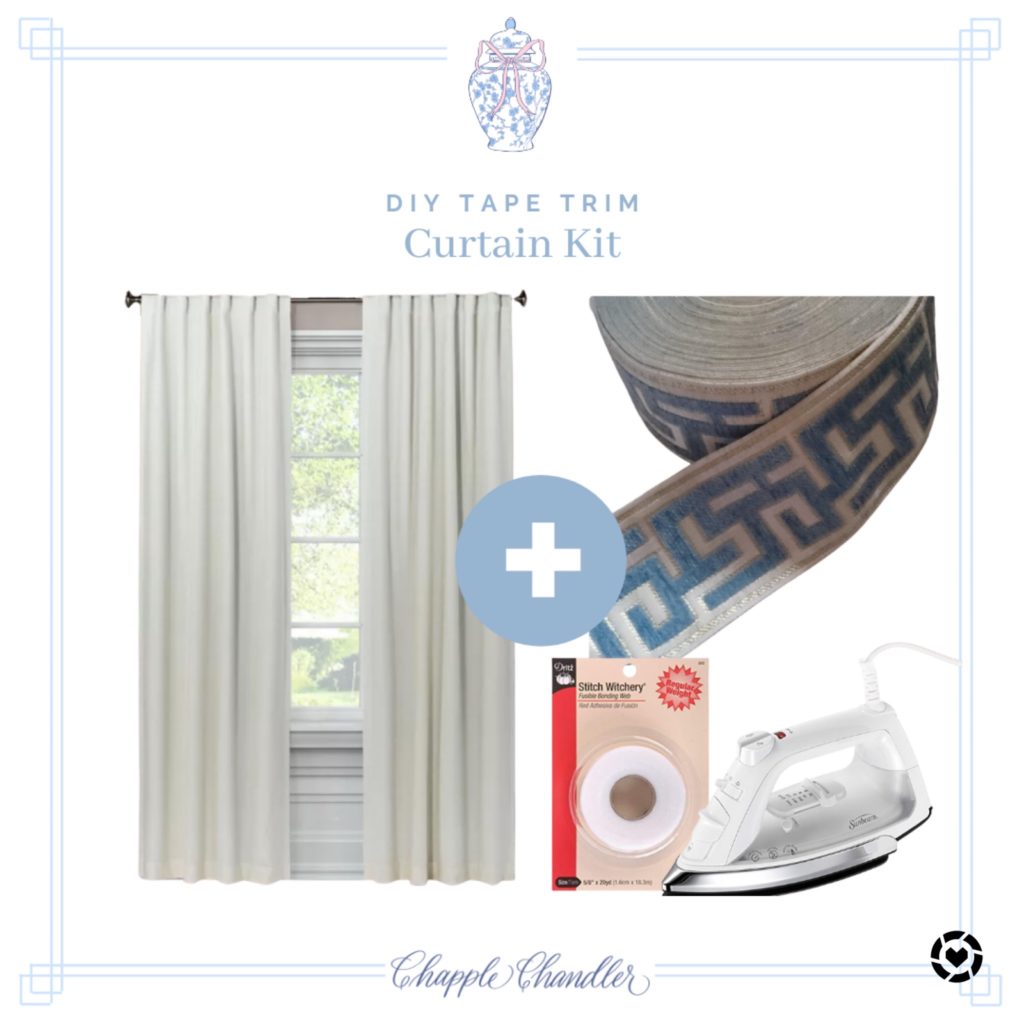

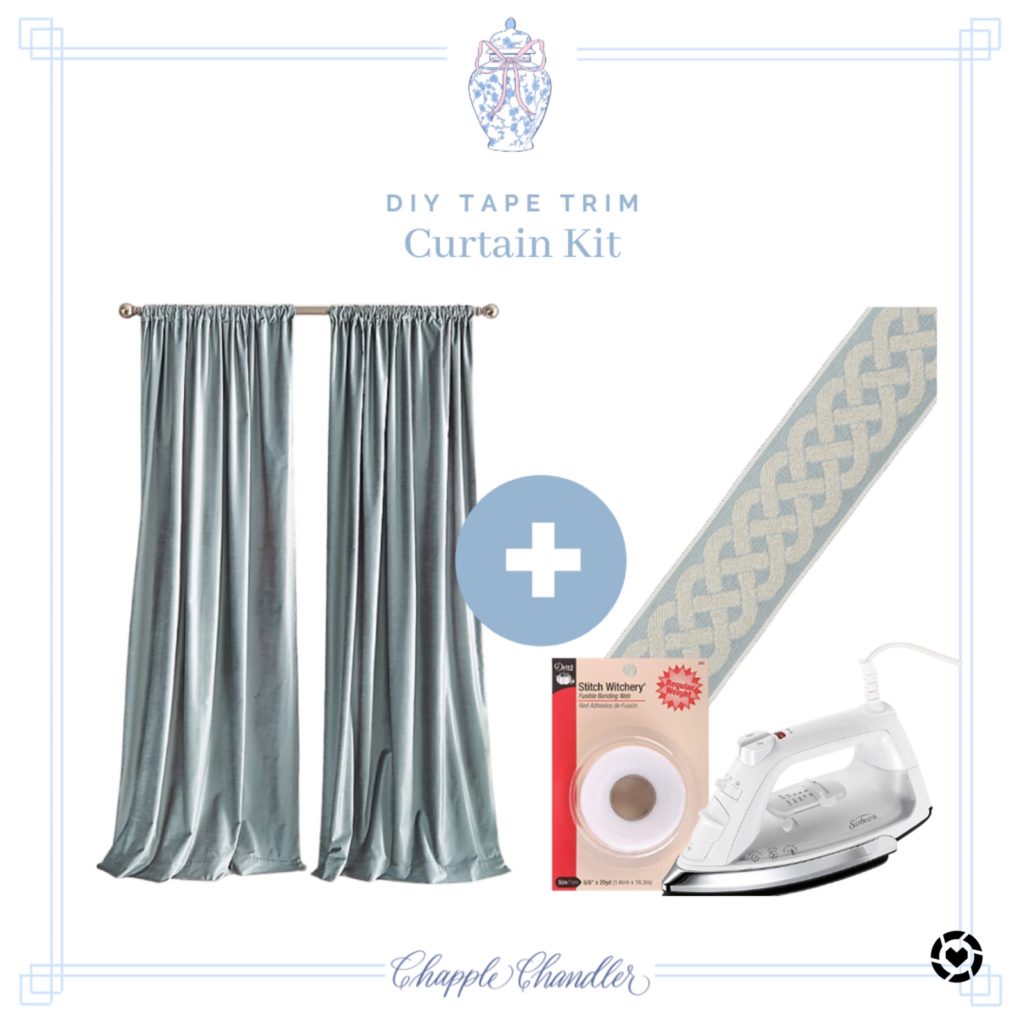
You’ll Need the Following Materials:
- Curtain panels fit to your window (See some budget-friendly options in the clickable links in this post)
- Between 10 and 20 yards of trim (I recommend measuring the length of the curtain from top to bottom, and multiply that by 4 for each set of 2 curtains. If you’d like trim on the bottom, also add the width of the curtain x2 for each set of 2 curtains)
- Stitch Witchery
- Iron
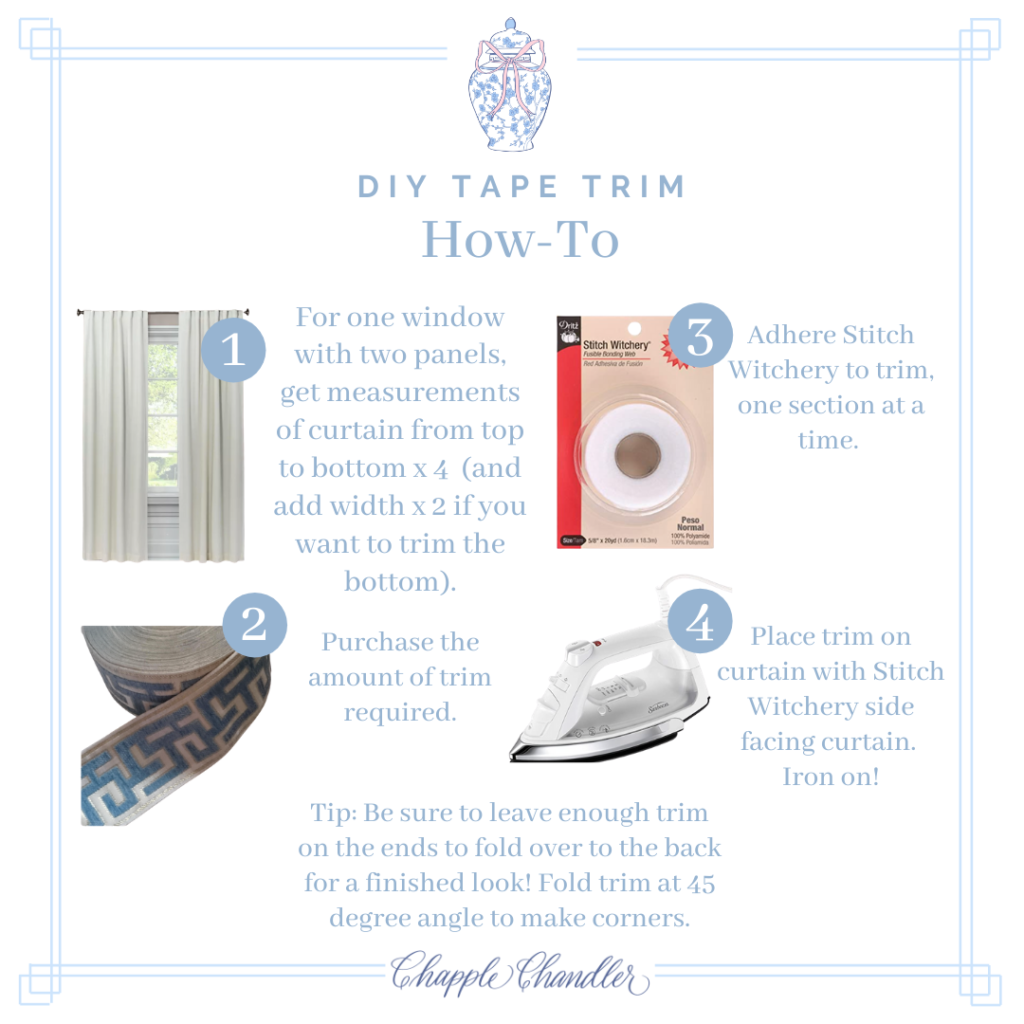
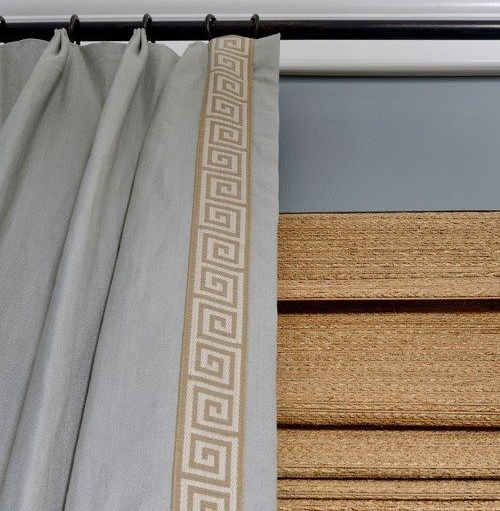
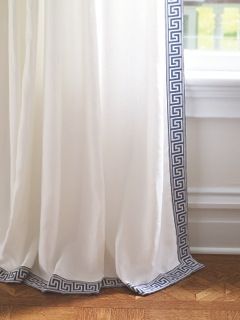
Lay out your curtain panels on the floor or large surface. Use a tape measure or ruler to determine how far into the panel you’d like the trim to be. I would suggest an inch and a half in so there’s a some color showing on each side of the trim, but you can trim the far edge, and that’s also a popular way to do it.
Flip the trim over and place Stitch Witchery on the curtain where you want the trim to go. If you have a thicker trim, you may want to place two or three rows of Stitch Witchery. Then Flip the trim back over so the tape is between the trim and the curtain. Be sure to leave an inch of both tape and trim at the end so you can fold these trim over the edge of the curtain panel.
Use a wet press cloth and steam iron to create steam when ironing on. The adhesive will not stick without steam. With a hot iron, carefully press the iron over the trim without moving it back and forth, working in sections. Keep the iron stationery in each section. Don’t move it back in forth, or you risk moving the trim!
Once you complete the first section, turn the corner of the panel and fold the trim over the top edge of the curtain to the back, and follow the same process to using Stitck Witchery to adhere. This creates a finished look at the top and bottom of the curtain.
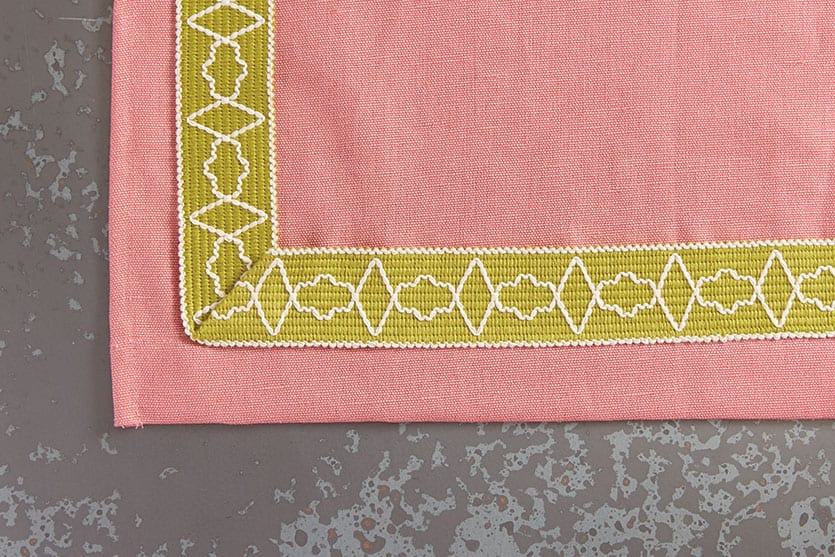
If you’re creating a corner with your trim and plan to trim along the bottom of the curtain, fold the trim at a 45 degree angle in the corner. Iron the corner down with Stitch Witchery, just as you did along the first edge of the panel, and continue the rest of the process all the way around the three edges sides of the panel. (No trim is needed at the top width of the curtain)
If you want to save on trim, you can skip the corners and bottom width of the curtain and just do a straight trim from top to bottom on each side of the panel.
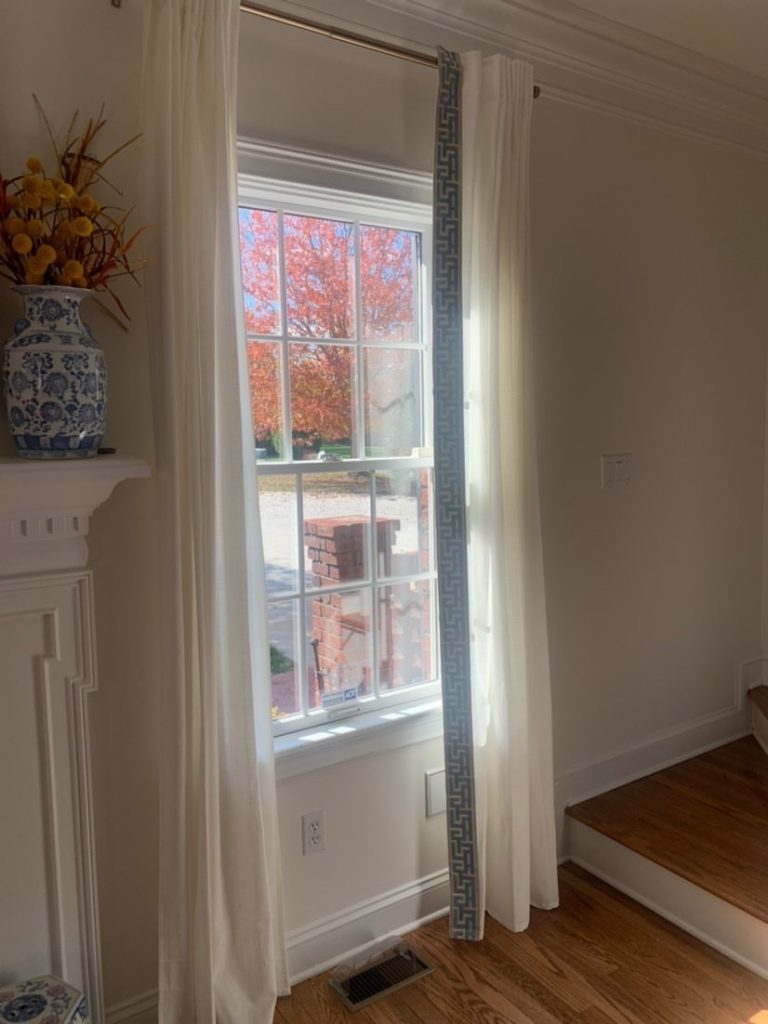
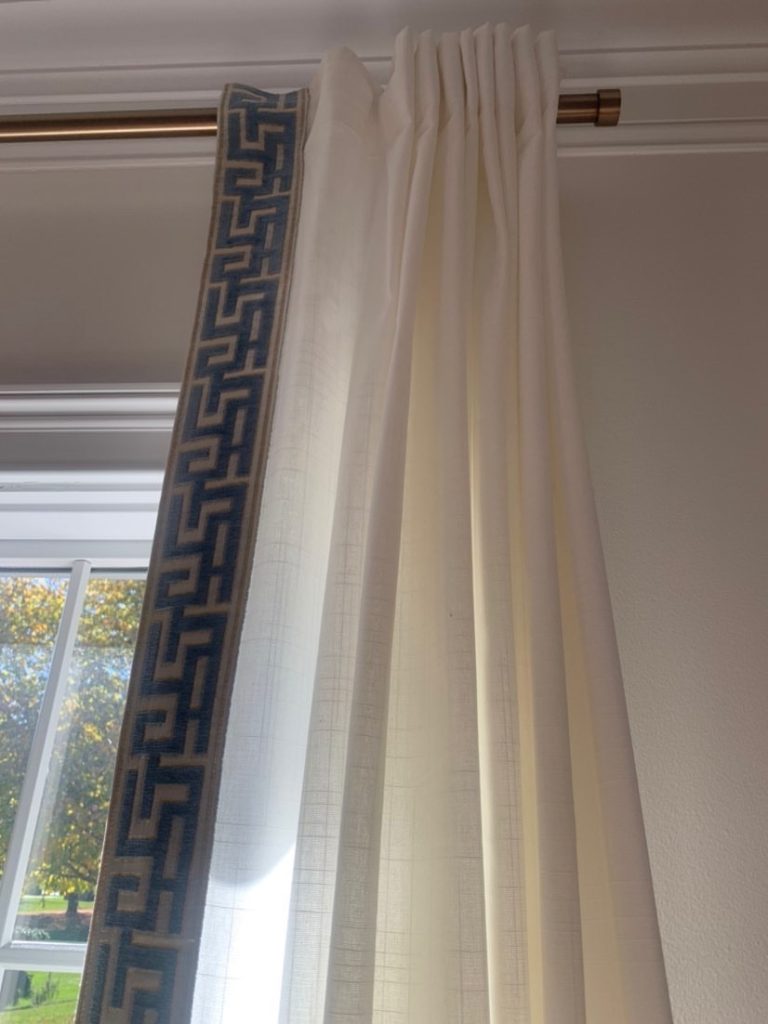
Your finished curtains should look like this:
Send me a dm on Instagram @chapplechandler if you have any questions before you start! I’d love to see photos of your finished curtains!

Leave a Reply
You must be logged in to post a comment.